Monday, July 12, 2010

BOOKS

I am in love with books. I am a Twilight fan and I own the whole series including The Short Second Life of Bree Tanner. I read the Mortal Instruments (BEST SERIES EVER) And I do own the second but I lent it to a friend. What can I say, I'm just like any other teenage girl!


Since I like to read I need a bookmark right? I made this one yesterday. I used kraft card stock as the base, paper from My Mind's Eye for the patterned layers and dictionary papers. The dictionary papers are of the words Bookcase and Book. I made the top layer of patterned paper into a tag (for no particular reason) I stamped my first initial onto it too.


On the back I put the word novel and an e stamp from a store in Pasadena, CA. I put it on the back of all my cards. Now I just need a book to put it in because I just finished Dark Flame by Alyson Noel. But that's not a problem, I have many books lined up to read. So many actually, that just that list will last me until I need a new bookmark.


The books on the shelf are all books I'd recommend to anyone who likes YA Fantasy Fiction. If you can't tell from the picture they are (in order from left to right)(not including Home from the Vinyl Cafe):
Twilight- Stephenie Meyer
New Moon- Stephenie Meyer
Eclipse- Stephenie Meyer
Short Second Life of Bree Tanner- Stephenie Meyer
Breaking Dawn- Stephenie Meyer
Blue Bloods- Melissa De La Cruz

Kissed By and Angel- Elizabeth Chandler
Evermore- Alyson Noel
Blue Moon- Alyson Noel
Shadowland- Alyson Noel
Dark Flame- Alyson Noel

Secret Society- Tom Dolby
City Of Bones- Cassandra Clare
(MIA) City of Ashes- Cassandra Clare
City of Glass- Cassandra Clare

Elsewhere- Gabrielle Zevin

Tuesday, July 6, 2010

Altered Book Box

I made this "love" Altered book box about a week ago. Sorry I'm only getting around to it now. I really don't have an excuse for not posting it, it wasn't like I was busy or anything. Now that its summer I've just kinda been chillin' out. But all that aside let me show you some of the details.

I made this little enclosure thingy with a loop of paper, ribbon, piece of chipboard, a flower and some rhinestones. It's not like it needs it though, the book stays closed on it's own. It was a soft cover book before but I put chipboard over the cover so it was a bit stronger.


Here is a picture of the inside. The hole was cut with an x-acto knife.


Inside I put a miniature 2 of hearts playing card and a plasticene heart. Sadly I only had green plasticene so I had to paint it. BTW its really hard to paint plasticene.


I'm really bad at cutting out the holes in these altered book boxes so instead of covering the inside with paper I made a concoction of white paint, mod podge and white glue to fill in the unstraight sides. When this concoction dried, it crack. This wasn't an issue though because I thought it gave it a cool look. To enhance the cracks I rubbed some black paint into the cracks.


I put some masking tape around the edge and painted it black. Not really any reasoning behind this I just thought it looked cool.


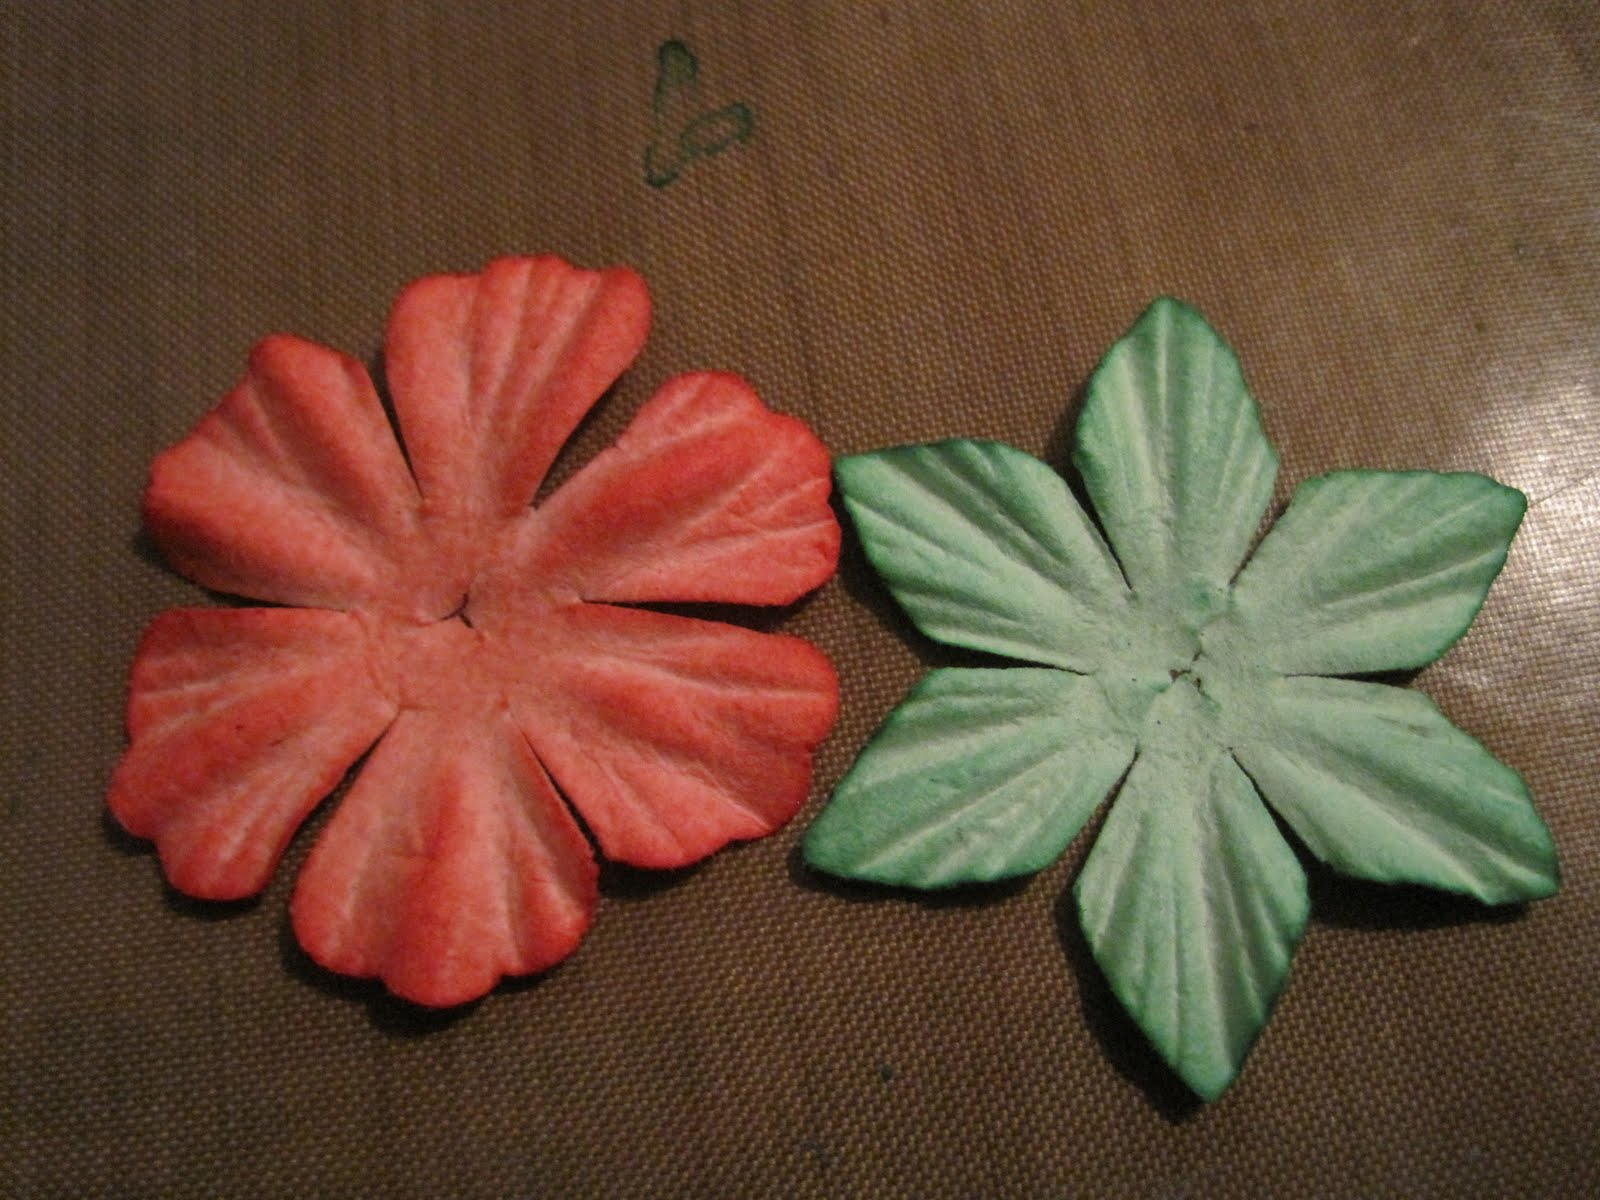
Now I'm going to show you how I made the flowers on the top of the box.


1st: get some white paper flowers. (one for the leaves and one for the petals)


2nd: You will need some sort of water based paint. I had these paint dabber things.


3rd: put some on a paint pallet or in my case a craft sheet.


4th: I added water to it to make the paint even more watery.


5th: Drip the paint into the center of the flower.


6th: The paint will spread out until you get something like this.


7th: Once dry the flowers will be dark at the tips and lighter in the center.


8th: Layer


9th: Add a gem or rhinestone.

Wednesday, June 23, 2010

Bird House

Awhile back my mother gave me this old decorative bird house that she didn't want anymore. It was a little dark for my liking so i painted it.

This is what i did. It is definitely bright, cute and girly!


Here is a better look at the leaves on the top ------>


<----- For the back and sides I used a sponge and white paint to look like clouds.

Saturday, June 19, 2010

When you don't want to study...

...CRAFT!!!

So over the weekend I was studying really hard but everyone needs a break now and then so here are a few things.

I got the cutter bee scissors on the weekend and I wanted to try them out so here's a card with ribbon and precision cutting. I have to say they are really good scissors.


I had a piece of green, black and pink card stock coincidentally on the table and i was like, hey that's cool! Then I made a card.

I thought I would try something a little out of my comfort zone. I don't use a lot of pattern paper on my cards but I'm pretty happy with the outcome of this.


Okay, when I went to micheals I had two 50% off coupons. The scissors weren't my only splurge. I got the Crop-A-Dile Big Bite 2! I had my eye on it for a while but was like, no $54 is a lot, I will wait for a 50% off coupon. I wanted it because I saw a barbie shoe bracelet on http://www.kmckaydesigns.com/. Now don't worry i wanted it for many more reasons.


I Just put some holes into the shoes and put them on a chain.

As you can see, the Crop-A-Dile punches through everything!


One of my favourite things in the WHOLE WORLD are rainbows!

I always envied my friend's bucket of pencil crayons so I decided to make my own version!

I filled the bottom of some cups with dew drops and covered the icon on the front of the cups and called it done! Well not totally done. I still had to sort all the pencil crayons but whatever.


Sunday, May 23, 2010

Happy Sunday!

I made this little scene a few days ago and I thought I would show it to you.

I found the little tray at the dollar store and i thought it was really cute. When i got it, it was just the raw wood so i painted it a pretty light blue colour.

The mug was a Christmas one so I painted it purple. It was a challenge to paint the mug because it was all glossy and stuff so it took a lot of paint, paint that was a mix of dark purple and white. I had to keep remixing more paint but it was never exactly the same as the first. Inside the mug you can see a little brown (coffee), that was made be mixing a lot of white glue and a little brown paint.

There isn't really a point to the dominoes, they just looked pretty. To glue them in the right places i used a VERY small bit of hot glue so it wouldn't show when looked at from different angles.

The book page is just a normal book page, nothing special. (I ripped it a bit though)

Then I took a few flowers (from my lent is over post) and arranged them in the corners.

The spoon is just an old spoon. I wanted to position it differently but there was a logo on the end and i wanted to cover it. On the spoon I dripped a bit of the "coffee."

Friday, May 21, 2010

Paintings!

I have done a few paintings lately and I wanted to share them with you. The one above i used a few different "painting" tools. I used a paint brush for the black and blue, a toilet paper roll for the green, the end of a pencil for the yellow and a piece of lego for the purple.

I gave this painting to my friend for her birthday. I hope she likes it! I can't really take credit for this painting because I basically copied it from a painting i saw in the background of the bubblelush's youtube video of her craft room. I just loved it sooo much i had to try it. You can't see in this picture but I glimmer misted the whole thing in iridescent gold.


Embossing

I bought an embossing gun awhile ago and i just wanted to share with you a little trick.I had this orange brad but it didn't look very good with the project i was using it for so i decided to emboss it.

First i dipped it into an embossing ink pad.


The into some white embossing powder.

*I store my embossing powders in Ziploc containers so i don't have to use a folded piece of paper.


Then heat and repeat (about 3 times)

*You are going to want to hold the brad with tweezers because you will burn your hand if you hold the brad.


Then i stuck it in a Prima flower and was ready to go!